Page History
...
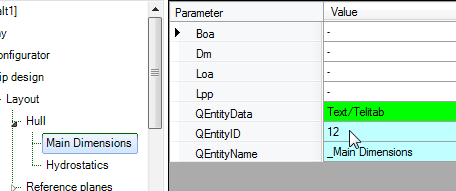
- Look-up the ID by browsing to the entity in the taxonomy and read the QEntityId: The QEntityId of Entity “Main Dimensions” is 12. Figure 53 shows that QEntityId = 12 for Entity “Main Dimensions”.
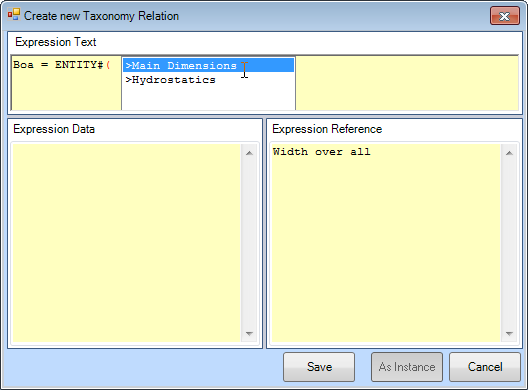
- Inside the Expression Editor, press Right-Arrow to initiate a “walk through” menu to navigate through all entity levels in your taxonomy (showing QEntityNames). Repeatedly scroll and press Right-Arrow until you have reached the entity you want, press Enter, and its ID will be filled in in the expression.
| Note |
|---|
The value of |
| Info |
The value of QEntityID of |
After selecting/entering the correct ID, placing the closing bracket and placing the dot, Quaestor will show all available parameters in the selected entity. You can scroll to the correct parameter and press Enter to select the parameter.
...
This means Boa is equal to (will copy the value of) the Boa of the entity with QEntityID = 12.
Hereafter, the cell colour of “Boa” in “Hydrostatics” has turned to yellow. So, cells of parameters with relations in Entities are coloured yellow.
To reset the parameter back to an input value, select this parameter in Right-Click on it the Workbase and select the right mouse button menu Taxonomy>Value Taxonomy > Value = Input or or press Ctrl+T again.
To edit an encapsulated entity relation, select Right-Click on the pertaining parameter in the Workbase this parameter and select the right mouse button menu Taxonomy>Edit relation or and select Taxonomy > Edit Relation or press Ctrl+M.Please note that the Entity
| Info |
|---|
An entity relation is something special. |
...
If you have experience with creating Quaestor knowledge bases (see the Tutorials on Quaestor basics |
...
), you will know that normally, a relation will be visible in the Knowledge Browser. Entity |
...
relations however, will only |
...
show themselves by the yellow colour of their parameters and the relation can only be shown by pressing Ctrl+M. |
- Create an entity relation for
Lppin entityHydrostaticsin the same way
...
- . This parameter must be equal to the value of
...
Lpp
...
- in Entity
...
-
Main Dimensions:
Lpp = ENTITY#(12).Lpp
Finally we will provide relation , relations must be provided to calculate “Displacement” and “Volume” in Entity “entity Hydrostatics”. The following calculation calculations should be made:
Displacement
...
= Cb * Lpp * Boa * T_design * Rho
Volume
...
= Cb * Lpp * Boa * T_design
Note that these These relations can be created in two ways:
- Add the relations to the Taxonomy as already done for the other parameters using the mouse button menu Taxonomy>Choose/create relation or Ctrl+T. Now you will have to delete the taxonomy like above by Ctrl+T and then delete ENTITY#() function and add enter the expression. Or,
- Add the relations to the Knowledge Browser and include these for the parameters in an Entityentity.
The second method is very convenient when you know that the a particular relation might be used (connected) in several Entitiesentities. By adding the relation to the Knowledge Browser, you can connect is several times to different parameters in different Entities, saving a lot of time. See also paragraph 2.3.4 below. TODO
- Create
...
Volume
...
- using the first method.
The second method will be used for parameter “parameter Displacement”, which is explained below.
...
Connecting existing relations to entities
Start with creating one or more relations in the Knowledge Browser.
...
Overview
Content Tools