Page History
...
| Info |
|---|
Entities can have one of three colors:
|
...
Once an input value is given, the cell color changed changes to light blue. You can always change your input values later on.
...
You see that yellow and white cells are shown. A yellow cell means that a value is a Top Goal for the analysis (inside the entity) and it will be determined by a relation. For example, select Lpp in the Entity (shown in Figure 13) and you can see that the value is computed by means of the relation Lpp = Entiy#Entity#(20).Lpp, as shown in the Explanation window on the leftright.
If you do not have the explanation part “Computed in solution by:”, please select Tools > Options > Explanation and check Requested by/determined by.
...
You have selected optional entity Decks, so you have to indicate the number of Deck entities you want to include and these automatically be placed . These will be automatically placed below entity Decks. In this tutorial we need two decks.
...
As you can see above, the total accommodation area will be computed at the level of entity Decks. Total_accommodation_area results from the summation of all areas of Deck's, using the Deck_function$ named 'Accommodation'.
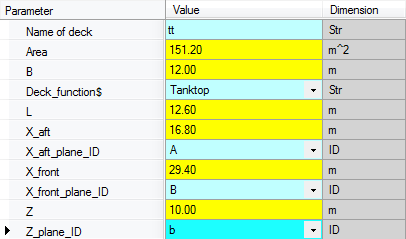
- Select the first entity
Deckin the tree. - Enter input values as shown here and click Next:
...
For the second deck the same parameters are requested. Here, another Deck_function$ is used. Please note that in the mean time, the entity node name in the tree view of the first deck is changed into a more recognizable name than just Deck. Now the entity node name of the first Deck contains the name of the deck and the deck height.
- Select the second entity
Deckin the tree. - Enter input values as shown here and click Next:
 Now,
Now, Bulkheads is selected in
- Select entity
Bulkheadsin the tree.
This ship configurator uses ant an entity structure for defining (transverse) bulkheads that differs from the one used for the decks. Of course, the same entity structure could be used, but it is more instructive to present a different presentation form. First, you have to provide the number of bulkheads you want to include in your ship design.
...
Now a table of two columns is created in the table view, each representing a singular single bulkhead. After completing entity Bulkheads the ship lay out is completed.
...
Overview
Content Tools